BLOGGER TEMPLATES AND TWITTER BACKGROUNDS »
Showing posts with label cards. Show all posts

Monday, December 2, 2013

Boss' Birthday 2013

I'm trying to post up some of the older cards I have made this year. I, like usual, forget to add them to my blog when I make them. Luckily I always take a pic of them before sending the off or giving them away. This is a birthday card for my boss. I make them for everyone in the office (when I remember). She is an older lady and do not know much about her, so I went basic with pretty and flowers. I got these flowers from the dollar store! You get a bunch for super cheap and I use them a lot in cards. The leaf and swirl is from a stock pile of Cricut cuts I borrowed from my sister-in-law. I like the look of the two tone card. Sometimes I can make it work and sometimes I don't have matching paper. But this worked!


Sister- In-Laws Birthday 2013

I like the look of the separate little boxes with pictures in them. To me they look "mathematically" correct. The even number of boxes. Even though design wise it always supposed to be in 3's. But this is simple and fun. Works with anything as well. If you check a few posts back, you can see I did the same design for Christmas cards. The purple squares are actually embossed, but I had to emboss it by hand, so might not show up very well. A white ink stamp was used on the edges of the purple squares to make them pop. They are also attached with a foam piece, so it has a 3D effect.I used a template to get the folder tab. It actually is a separate piece of paper that is on the top inside for space for a gift card. The green paper is lightly stamped with white ink and a swirl design for a little extra depth. Over all, a fun card.


Friday, May 10, 2013

Cousin Birthday

I got a Facebook message asking to make a card form one of my cousins to her sister (my other cousin). I just made something real quick. Its not my usual style, but ended up being so cute. It's rare for me to be sad that I'm sending away a card, but this one is so cute. I'll have to make another. The flower is just one from the dollar store. The rabbit cut from a Cricut. The red stamping in the background from acrylic stamp.


Thursday, May 9, 2013

Italian Birthday

A card I made for a co-worker. She and her husband are from Italy. They both work here. They speak decent English, but learning a ton in the process. I did the card at last minute and just did something simple. The flower would have done well a bit smaller, but it still is pretty. I stamped on either sides of the ribbon to add something extra. The text is actually recycled from an old store bought. Simple and easy. I would have rather had a jewel or something else in the flower, but I ran out of them.  

Friday, April 19, 2013

Birthday Skulls

Card I made for another co-workers birthday  She likes skulls and things like I do. Thought this was unique and cool. I love the black swirl paper that I got. I cheated a bit and colored it in with a black paint marker to make it shiny. The stars are 3d and actually painted with nail polish! Pretty cool.


Monday, April 8, 2013

Mom's Birthday 2013

I have been sick with the flu the past two weeks. At the last minute I felt better and realized it was my Mothers birthday. We made plans to hang out the day before her birthday (Saturday). Because I an terrible about have a few cards good to go, I had to come up with one on the fly. It took be a few tries to get something I kinda liked. And a huge mess in my room afterward to clean. But she liked it and that was the important part. The cake and "Happy Birthday" are 3D.


Friday, April 5, 2013

Bosses' Birthday

Card I made for my bosses' birthday. I don't really know her well, so I had to ask around for colors and what type of woman she is. If she is girly girl or not. This I think, is cool. Simple but pretty. The cake is on a spring, so its bounces around. The green frame is rubber and the background paper, with the dots, is also on foam, so its 3D. I've always hated using wet glue on cards, but I am finding for stuff like the bow, it helps a lot. Or maybe I need to invest in some sticky dots. Would have been cool to emboss the dot page. But I'm working on getting an embosser.


Confirmation

This is a card I made for my niece's Confirmation on Easter. It was at the last minute I realized I needed to make a card. Since I've been working full time now, its harder to remember all the things I need a card for. I need to plan a day that I can make a bunch of cards and when something comes up, I can personalize them for the occasion. Looking forward to making my sisters wedding invitations. Its in Sept, so Ill have a time crunch to get some done every weekend. But should be fun. I hope.


Monday, December 10, 2012

Christmas 2012 Cards

Its been awhile since I have written. Life has changed a bit. But still making my cards. The past two years I've made a bunch for holidays and birthdays. I have pictures, but they are all on another hard drive. So for now, I will present you with Christmas Cards for 2012!! These turned out really nice. I was stuck at first because I did not have many embellishments. I'm currently unemployed, so buying stuff was out of the question. I did, however, thanks to my sister-in-law, get to borrow her Cricut!! It was the first time I have used one. It was amazing!! She only has two cartridges, but I have a pile about 4 inches high of shapes I have cut out. The one thing I missed from it was any embossing. I have some paper that is already embossed that I got for an anniversary gift earlier this year, so I have been using a lot of that. With all that said, I got some great cards made this year! This year I am asking for Christmas a Sizzix Big Shot. Cuts and embosses! Already have a bunch of die and embossing folders on my Amazon wish list. Now with the awesome cards, I just have to figure out who gets which one. I usually have someone in mind when I make my cards, but this year I just sat down and created.


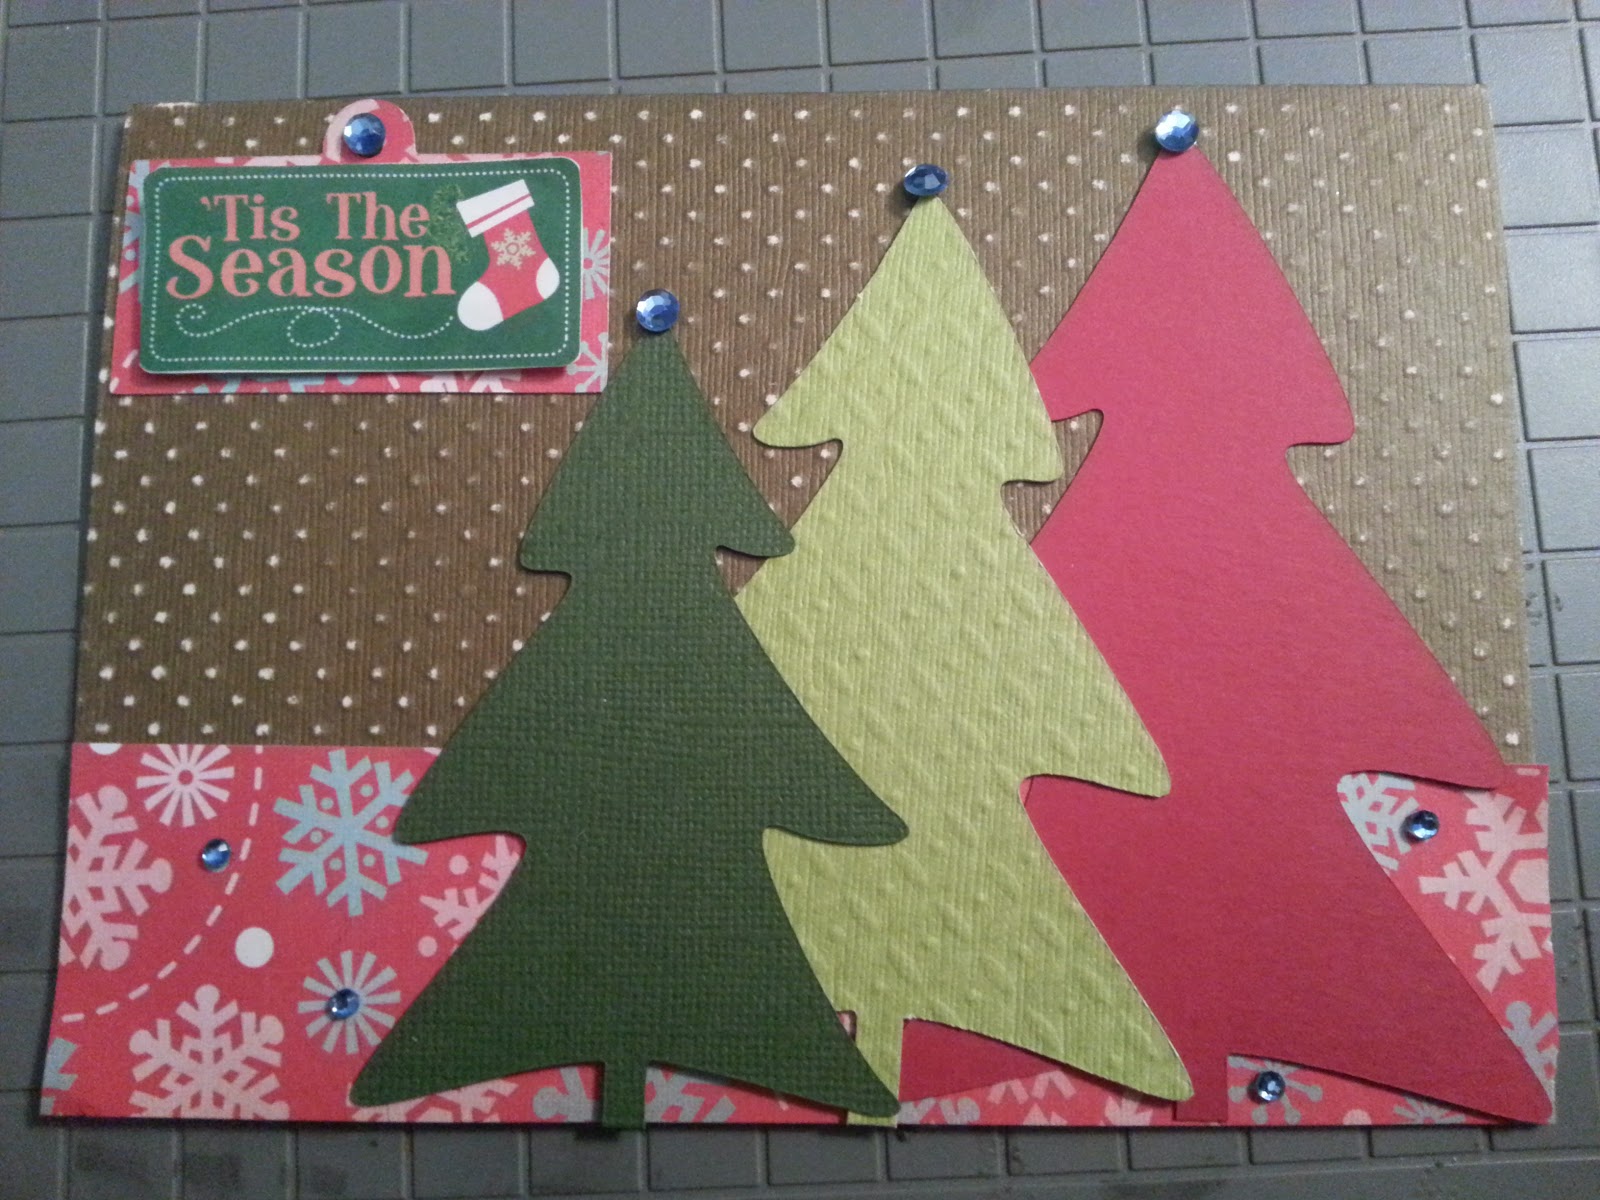
I used the Cricut for the trees. The card stock is a embossed in a dot form. I sanded the top to make the white underneath show. The sign is 3D.


Got this idea from my Mom. She brought over a ton of sequins when I was hurt and couldn't walk for art projects. All hand glued. The whit swirl is a acrylic stamp.


The first one of the year I made. I actually from an old card from someone I saved from last year. I just cut it up and remade it. The three pieces are 3D on a red background to give it more definition.


An updated version from last year. I used a scrapbook page that had the poinsettia in the middle and just cut it out by hand. The card stock is a green woven texture. The paper behind the ribbon is glittery circles. I added the gemstones to the middle and petals with tacky glue. The words are 3d and the flower is 3d as well with foam.


Though this looked elegant. The card stock is a diamond embossed paper. The red ribbon is silky and the poinsettia are 3D. Diamonds on the edge to look fancy.


My least favorite.  I was going to classical gold and traditional greeting. But I ended up cutting the wording wrong and had to hide it with the holly. A gold-ish card stock with a rippled embossed cut.


A super favorite of mine. Used with the Cricut. A gray diamond embossed card stock. The swirls are glittery silver and the white tree is shiny pearl white. I like the use of the holiday words in the green star. The tree and green star are both 3D.


My favorite style this year. I made two more like it in different colors. This is blue card stock with a white pearl gloss on top, so the blue shows thru. All elements are basically 3D. The background squares I measured at 2x2. The trees are felt. Each square has a few gems on it to tie it together and git it something extra.I will make one change before I send this one out, the words I will change to Merry Christmas and print it on blue paper.


Pink version.

Green version


And that ends the Christmas Cards 2012! Hopefully everyone will have a great Christmas and have new ideas for next year! Keep Crafting my friends!

Friday, August 6, 2010

More birthdays

It's been a busy month. Fixed up a house, moved into said house about four weeks later. So we have been in the house for officially 2 weeks now!! Its a great house. All new paint on everything. Clean and new. A new life start. It's exciting. During this time, there were two birthdays. My man's grandmother, which I consider mine too. I don't have any grandparents anymore, so she is mine. And his aunt's birthday. I made some nice cards for them. I ended up making Grandmother's card first, and liked it so much, that I made Aunt's card the same idea. Nice summer colors and the flowers on grandmothers card are actually from an old gift bag. So you can really find good pieces of art in everyday objects.

Grandmother's card:


Aunt Shell's card:


Monday, June 21, 2010

Anniversary Card

On May 27th, my man and I celebrated our 2nd year anniversary! It's been a great two years and looking forward to more. This card, like I have mentioned before, is a special card. It took me a day or two to get the idea of what I wanted to do with it, what colors, what I wanted to say. I try to make a red card for him for birthdays and anything else, but in two years, I haven't been able to. I never seem to have the red paper and accessories I want and need. But this works out just as good. I think it's one of my best. Even though I have packed all the decor from the living room away for moving, that's the only thing I kept out. It's that good. Let me know what you think.


(below)The hearts on the inside are 3D. I made this by taking the blue polka paper and folding it so the print is on the inside.
Take scissors or craft blade and cut small slits on folded edge. 2 slits per one pop out. You then are going to push the "block" you just cut to the inside of the card. So there will be a square missing from the paper when you look at it. Flip it back over to see the color side and the pop up square is there for you. Glue whatever design on there to make it pop up when the card opens. Check here for a better description from wikihow.com.


Friday, June 18, 2010

Valentine's Day Cards

I know its a long ways past Valentine's Day, but I have some of the pictures of the cards I made. These I was especially proud of. I did work hard on them. I have my own separate craft room, where I turn on a movie I really don't care about and get to work. I have to be in the "zone" to get a really great card, or else I just don't like what I made. I got plenty of already made cards, that I wasn't inspired to make, so I ended up putting them aside and will use them for scrap or re-design them.

The top one was for my man. I made sure out of all the cards I made, that was the most special. All of his are usually the best. All because I love him so much, and a little bit to show off my talent.


These were for other family members, like my mother and sisters.